With Thanksgiving behind us, we crafters are in full on Christmas mode. Today Dianelsie Manso of The Handcrafted Collection by N and D is showing us how to make alcohol ink Christmas ornaments. The are simple to make and beautiful to behold!
Intro Handmade Christmas ornaments are fabulous for many reasons. If you make your ornaments as gifts, they are forever cherished. If you make them to sell at shows or in your Etsy shop, they are always a hit. Dianelsie gives us the step by step on how to make alcohol ink Christmas ornaments that are as unique as each artist who creates them.
Each ornament only takes a small amount of ink and mere minutes to make. Which makes them easy to make in larger batches. Which is always a plus when you are working towards building your inventory. Whether you make these beautiful alcohol ink holiday ornaments to sell, gift, or keep. We hope you love them as much as we do!

How to Make Alcohol Ink Christmas Ornaments
Brea Reese Alcohol inks offer stunning colors and a gorgeous watercolor look to whatever canvas they are used on. Many of you love using them on tumblers because of the beautiful effects they create. If you have never worked with these inks before, you are in for a real treat. If this is your first time using alcohol inks, here are a few things to keep in mind…
- A little bit goes a long way. Just a drop or two of alcohol ink will give you color for days. And many of the colors are so vibrant, they actually need to be diluted with alcohol a bit for this project. Dianelsie explains all about dilution in the video below. But just remember to start with a tiny amount and add more only if you need to. That way you won’t waste any product.
- Alcohol inks can be a little messy so glove up to keep your fingers from being stained. And protect your table tops with something like butcher paper.
- The inks will also stain your paint brushes. If you make a lot of these hand painted ornaments like Dianelsie does, your brushes will get stained and ruined from the alcohol. For this reason, Dianelsie recommends using cheap brushes from the dollar store. That way when you end up having to pitch them, you aren’t out a ton of money. Just check your brushes before each use to make sure there aren’t any loose bristles. Remove any that are falling out. Otherwise they will get stuck in your project and ruin the inks.

What Ornaments Should you Start with?
In the video below, Dianelsie shows us all the types of ornaments that we can use for this project. Her favorites are white porcelain or ceramic bulbs. She loves how sturdy they are. But it can sometimes be hard to find them. And even when you do, you still have options. They come in matte or glossy finish. Iridescent is also a popular option. And each type gives you a different effect one the inks hit them.
You can also use glass ornaments. Glass ornaments also come in a variety of matte, shiny, or iridescent. Either clear as the come, or painted white to give you an opaque base. (More on that later) You can also add a coat of Quick Coat and glitter to the ornaments before you add your inks for added shimmer and fun.

Another option is plastic ornaments. The process for these will be the same as with glass or ceramic, but the results will differ. White plastic ornaments are Dianelesie’s second favorite to use because of how they come out. And they are basically shatter proof.
So use whatever you can find or have on hand. Play around with a few different bases and decide which ones you like best!

How to Paint Glass Ornaments White
Painting your glass ornaments white is easy. But there is a trick to it. The biggest thing is that you want to paint the inside of the ornament instead of the outside. That way your alcohol inks still have the right surface to adhere to. And are still the star of the show. All you need to paint the inside of your ornament is Alabaster White Rick’s Mix and a few medicine cups.
First, take off the top of your ornament. Then pour a little bit of the Rick’s Mix into the ornament. Then tilt and swirl the ornament to swirl the paint around the whole ball. Once it is coated, turn it upside down on a medicine cup so the paint can drain and dry. If you want the ornament more opaque, you can add a second coat of paint once the first coat is dry.

Watch the Video Tutorial Here!

How to Make Alcohol Ink Christmas Ornaments
Materials
- Ceramic or porcelain, round white Christmas ornament
- Brea Reese Alcohol Inks
- Brea Reese Alcohol Ink Silver
- Brea Reese Alcohol Ink Gold
- Brea Reese Alcohol Berry
- Brea Reese Alcohol Ocean Green
- Rubbing alcohol
- Small paint brushes
- Fine tip needle pour spouts for the alcohol inks
- Small squeeze bottles with small tip Empty Brea Reese bottles for your metallic colors
- Table protection, the inks will stain
- Small paint tray
- Kamar varnish
- UV resistant clear spray finish
- ribbon for bow or premade small bows
Instructions
- Fill an empty Brea Reese bottle with alcohol. Then add one squirt of the Silver Metallic alcohol ink and shake to combine. Then put the needle tip onto the bottle.
- Repeat the same process with a new bottle and Gold Metallic alcohol ink.
- Pour a couple drops of the Berry and Ocean Green inks into your paint tray. Then dilute the Berry with a drop or two of alcohol.
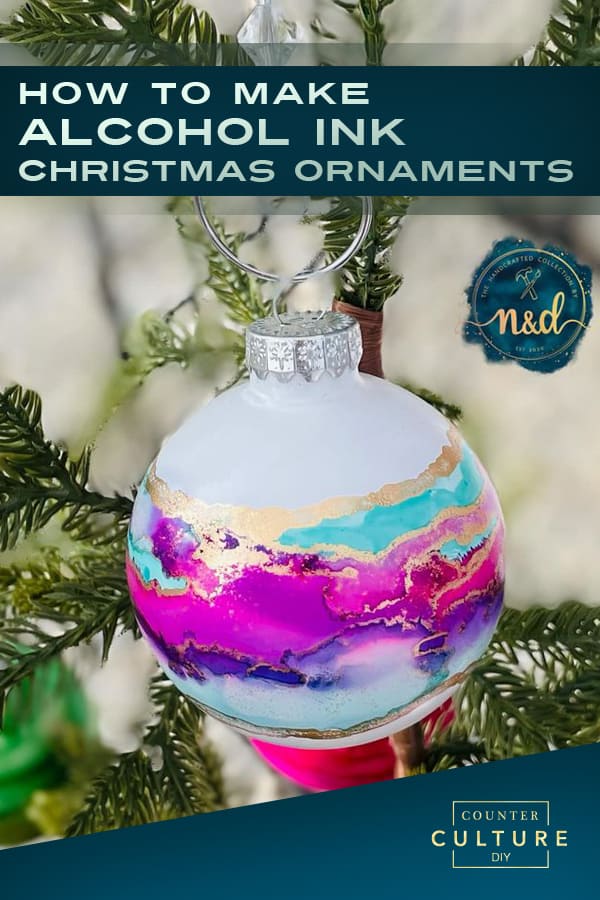
- Leave about an inch of white space at the top of your ornament. Right below it, start painting on the Berry. You don't want the brush to be too wet with ink or it will drip and not go on as smoothly. Make a Berry stripe as wide as you want it, remembering that you have another color to work with too.
- Next, use a different brush to go a little beneath the Berry stripe and add an Ocean Green stripe.
- Then blend the edges of the two stripes.
- Next, add another line of the berry and blend those edges too.
- Now grab the alcohol/Silver solution that you made. Hold the ornament in one hand and the bottle in the other. Hold the bottle at an angle and, starting at the top, lightly drip the silver combo onto the ornament as you rotate it.
- Blow the ink to dry it and blend it. Then repeat the same process at the points where your colors meet.
- When you have all the silver effects that you want, put a couple of pure silver (not diluted) in your paint tray. Use a fine brush to add a small line of silver at the top and bottom of your other colors to outline them. Add a second coat of the silver if you want it darker.
- Set your ornament aside to dry and move onto another. Once your ornaments are dry, spray them with the Kamar varnish to keep your inks from running when you seal them. Do three coats, waiting about 30 minutes in between each coat.
- Then give them a coat of the UV resistant clear spray to finish them off. Once they are dry you can add a bow!
The Finishing Touches
And that is how you make alcohol ink Christmas ornaments! Once you get a handle on how much ink to use and have tried a few, they are very quick and simple to make. And you can use so many different color combinations! Even starting with just one color like Dianelsie did for one of her ornaments. You still get amazing shade variation when you add in the extra alcohol and metallic ink. You couldn’t make two alike if you tried!
Thank you to Dianelsie for showing us how to make these beautiful hand painted Christmas ornaments! If you loved learning from her and want to see more, you can find her on all the socials. See more of her work, her tutorials, and the other fun things she is up to here.

You can find more awesome video tutorials like this one on our YouTube channel!
Be sure to follow us on Pinterest so you can stay on top of everything that’s new and never miss a blog post!
If you want more inspiration and information we have a Facebook group for that. Join us in Counter Culture DIY Artist Support where we, and other artists, offer ideas, answer questions, and support each other!
Do you have an art project using any of our products that you want to share? Send it to us at support@counterculturediy.com, and we can feature them here!