Garage Sale Table Makeover Tutorial
/
/
Garage Sale Table Makeover Tutorial

Garage Sale Table Makeover Tutorial

Hello paint lovers! We have a really big treat for you today. Rick Cheadle of Cheadle Designs is giving us a garage sale table makeover tutorial. He is using Pop of Color Paints and his own line of amazing paints (Rick’s Mix) to give new life to a garage sale find. Wait until you see the gorgeous results!

Rick’s garage sale table makeover tutorial teaches us several different painting techniques. Including how to paint furniture and how to do an acrylic paint pour! If you have never done a paint pour before you are missing out on a lot of fun and creativity. Rick shows us how it is done and you will learn how to transform your own garage sale finds into something fabulous!

Rick gave us a great video tutorial but he also wrote out all of the steps in detail. That way you will be able to follow along with the process while you are painting. So, with out further adieu, we are turning this post over to the expert! Rick will take it from here…

garage sale table makeover

Garage Sale Table Makeover Tutorial

Few things in life are more rewarding than stepping back and enjoying the fruits of your labor. Mentally you can recall what your project started out like and marvel at what it turned into by its completion.

It’s such a good feeling to bring new life to something that was worn out and tired.

I found this table at a Garage sale for $10. From the moment I laid eyes on it, I could see an entirely new table form in my imagination.

I am adding a step-by-step guide along with the YouTube video tutorial below.

Follow me on my journey to take this table from Worn to WOW.

Step by Step Instructions

garage sale table makeover tutorial

1. Find a piece of furniture you want to makeover. I chose a table for my project but these same steps can be followed for a variety of different types of furniture.

2. Inspect the furniture. The main thing to look at when deciding if this is a good project piece is the integrity of the furniture. Is it worn and broken? If so, can it be easily repaired? It is sturdy? Does it have a good sound structure? If not, you may want to keep searching. Once you find the right piece you are all set to move to step #3.

3. Now its time to clean the furniture. I begin every furniture painting project with a thorough cleaning. My choice of cleaning products is Krud Kutter. Its a concentrated cleaner, degreaser and stain remover. Most all furniture will look better once this step is complete. You never want to add a beautiful finish over a layer of residue.

Prime your Garage Sale Table

4. You always want to start your project with some kind of primer. My table called for Navy Blue Shock Paint. Before I start applying my paint, I decided to add a black primer as a base. Navy is a dark color and I want to make sure I have a dark base underneath so I don’t need multiple coats of my Pop Of Color Paint. The primer that I used on this project is Prime Time in black by Counter Culture DIY. 

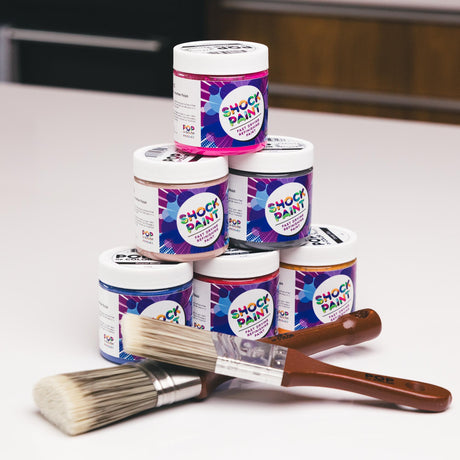
5. Now its time for the fun part. Applying the Pop of Color Paint. Your project is about to take shape. Choose a main color for your furniture. I am using Navy Blue as my main color so I want to coat my entire project in this color to start.  I always start by painting the bottom side first unless it looks really nice. Completely flip your furniture upside down and cover the entire piece with your base color. This gives you a chance to work with the paint in an area not likely to see seen so you can get your technique mastered. You will want to start by applying a thin coat. This prevents drips and uneven drying. Another tip that helps me it to pour the paint in a cup so its easier to handle and you have less chance of accidental spills.

Flip your Table

6. When you have the underside painted you will want to turn your piece over and completely cover the top side with that same color. Follow the same technique you were using on the bottom. Make sure you open any drawers or doors to ensure you have not missed any spots.

7. Once I have everything painted I do one final step to make sure I have completely covered all my surfaces. I take a bright light and go over the entire piece of furniture so I can take a close look at every nook and cranny. Any places that need extra attention can be fixed at this time. You will be amazed and what you see with your light that are not visible to the naked eye. You’ll be glad you did this step in the end so you don’t find something later that needed more paint.

8. Let the furniture dry. I always let my furniture dry overnight. Since I applied black primer first, I only needed 1 coat of the Navy Blue Pop Of Color.

Now for the Fun Part!

9. Lets get creative. You are only limited here by your imagination. I am using my unique line of paint called Rick’s Mix shown below. This paint is the perfect consistency for paint pouring. Its not too thick, not too thin. Its uniquely formulated for this technique. Here is a coupon code you can use when purchasing this paint. With this discount code you will get $10 off your purchase of $40 or more in paint. Enter Ricks01 at checkout.

10. For those not familiar with paint pouring you can see the exact technique in the video above. For my project I am using 5 different colors of Rick’s Mix. I start with a clear cup so its easy to see the layers of paint I’m adding. I begin with Alabaster White. Then I add just enough to cover the bottom of the cup. I’m guessing each of my pours is about 4 Tablespoons. However you do not need exact measurements. Since this is an abstract design, the more variations the better. Next I add Lapis Blue. I pour this directly in the cup, right in the middle of the white adding about the same amount of paint.

11. My 3rd paint choice is Surf’s up. Its a lighter blue. I also pour this in the middle of the cup. Now your layers are starting to take shape. Pouring the paint directly in the middle each time shifts the paint inside the cup making a unique pattern form. Paint #4 is Metallic Silver. You can see I use a variety of colors that all complement each other. Again pour a small amount right in the middle. I need to form a barrier now so I can add the next layers.

To do this, I am going to take CRC Heavy Duty Silicone Spray and spray a very small layer in the cup on top of my paint. Now you want to repeat the steps of pouring paint in the cup until it is full. My last paint choice is heavy white. I pour a layer of this directly on the table, not in the cup. Then I take a scraper and spread the paint out so it covers a strip down the middle of the table coating approximately half the tables surface.

Time to Pour!

12. Lets pour some paint. Taking the cup with the paint layers, pour straight down the center of the furniture directly on top of the white layer. I use a heat gun to form unique paint patterns. The heat will alter the paint layers just enough to unveil a circular blister like pattern. I only do this for about 30 seconds as you do not want the paint to start drying.

13. Then tip your furniture. Let the paint run from side to side. Tip in multiple directions so the paint can freely move toward the edges. Be very careful not to allow the paint to go over the edge running down the side to an area you do not wish to paint.

14. I love using a blow dryer to move the paint closer to the edge. It helps me to direct only the paint I want to move. Take a blow dryer and direct the air stream toward any areas that need the paint moved to the outside edges.

15. You will notice at this point that you have some areas that do not have paint coverage. I have found I can move the puddled paint by using a small art paint brush and lightly move the paint toward the edges. This covers any negative spaces that are not fully covered.

16. After allowing this to dry, I added details and highlights with Navy Blue to help tie together the table base and the table top. I used White and Black to add shades and tones. You can see the final paint patterns in the image below.

17. Lets protect our garage sale table makeover with a sealer. It is so important to do this step. You have put a lot of time an effort into your work of art. The surface is fragile at this point and not immune to scratches or stains. Plus adding a sealer give your project a shine that makes it look amazing. My favorite sealer is Quick Coat Urethane Sealer. Coat your entire project and then allow it to dry overnight.

Your project is now complete. Stand back and look at what you have created. You have given new life to something that may have been thrown out.

Not bad for $10 at a garage sale. I feel good that I have added years to the use this table will provide me.

Feel free to share your project pictures with me. I love to see what others create. You can email me at infoteam@rickcheadle.com

The Finishing Touches

Pop of Color popping in again…We want to give a big thanks to Rick for this fabulous furniture makeover tutorial! A lot of love went into this table and in sharing the information with us. If you loved learning from Rick as much as we did be sure to check out the links that Rick shares below. You can see his amazing artwork and learn more techniques from him! Have fun hitting the garage sales, we can’t wait to see what you create!

If you would like more details on paint pouring or joining my community please be sure to check out the following links.

Youtube – https://www.youtube.com/channel/UCsmYknOXe6JMBK_WovyyIbw

Facebook – https://www.facebook.com/CheadleDesigns/

Instagram – https://www.instagram.com/rickcheadle/

Pinterest – https://www.pinterest.com/cheadledesigns/_created/

Twitter – https://twitter.com/RickCheadle

Another one of Rick’s amazing creations!

Pop of Color Shock Paints are one of a kind chalk paints and sold exclusively at Counter Culture DIY. So now you have even more reasons to stop by!

You can find more awesome video tutorials like this one on our YouTube channel!

Be sure to follow us on Pinterest so you can stay on top of everything that’s new and never miss a blog post!

If you want more inspiration and information we have a Facebook group for that. Join us in Counter Culture DIY Artist Support where we, and other artists, offer ideas, answer questions, and support each other!

Do you have an art project using any of our products that you want to share? Send it to us at support@counterculturediy.com, and we can feature them here!

Share this post

Start typing and press Enter to search

Shopping Cart

No products in the cart.