Hello resin fans! We have another great resin tutorial for you today. Karen Horvath of MG Creations by Karen is giving us a fabulous DIY Resin notebook tutorial. She shares everything we need to know to make our own beautiful notebooks!
When it comes to resin art, many of the pieces we create make wonderful gifts. Whether for loved ones or our children’s teachers, our handmade creations are intended to be shared with others. Karen’s DIY resin notebook tutorial gives us an another wonderful gift idea to add to our repertoire.
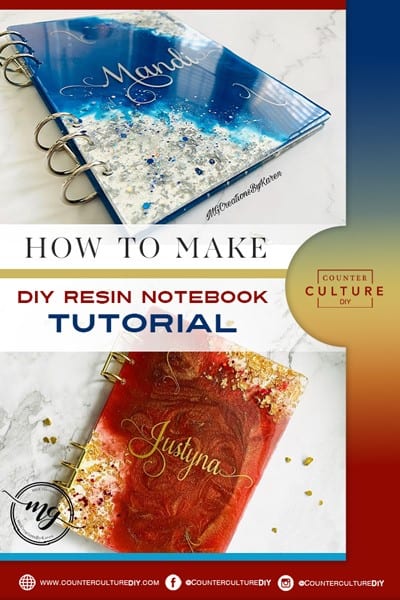
Using Thin Viscosity Artist Resin, gorgeous mica powders, and foil flakes, Karen makes a personalized notebook that is as beautiful as it is functional. Check out the video below to see how she does it!

DIY Resin Notebook Tutorial
Karen uses some gorgeous colors for her notebooks! The reds she uses in the video below are vibrant and lovely. She has also used other colors using the same method. And has many other notebook designs as well. Each one is uniquely beautiful and gives you an idea of the many ways you can make your own notebooks beautiful!
Once you see the formula Karen uses for this project, you’ll be able to make swaps and substitutions based on your own vision and favorite supplies!

Assembling your DIY Resin Notebook
Once you have selected your colors, mixed your supplies, and poured your notebook you are ready to assemble your notebook. Wait about 5 days for your final layer of epoxy to cure before demolding your notebook covers. After you have demolded your covers, line up the holes on the front and back covers. Make sure you have the correct side of each cover facing down on your work surface.
Next, lay your paper on top of one of the covers, lining up the holes. Then take one ring and slip it through the holes on both the cover and the pages. Repeat for all 6 of the holes. Then attach the other cover of your notebook and you are all set!

Resin Options
In the video, Karen explains why she loves our Thin Viscosity Artist Resin for this project. It allows her to maintain her mica swirls without having to babysit her piece for hours at a time. The Thin Viscosity sets up more quickly which means you’ll be able to walk away from it sooner.
One of the things we get asked about most often is the difference between our Artist Resins. Each one has it’s own characteristics that make it perfect for certain projects. Here is a quick overview of each one and its uses.
Traditional Artist Resin: Great for tumblers, especially for the flood coat. Artist Resin works great for uneven or rough surfaces. This is a very hard resin that can be used for large projects, countertops, and resin art.
Thin Viscosity Artist Resin: Great for most clear molds ¼” – 3/8”. Glitter and mica tend to gather on the bottom of the molds. Thin Viscosity works well to coat very flat surfaces because it moves easily and makes blending in your resin art easy. It can also be used for tumbler basecoats but is usually too thin for a top coat.
Medium Viscosity Artist Resin: Great for molds around ¼”. It will suspend glitter and mica very well in the mold. Medium Viscosity has a hard finish and is our most versatile resin. It makes a great base and top coat for tumblers and is a favorite among jewelry and keyring artists!
Whatever the project you want to try, we have the resin that will give you the best possible results!

Watch the Video Tutorial Here!

DIY Resin Notebook Tutorial
Materials
- Notebook Mold A5 The notebook will be 8 1/2 x 6
- Binder rings we have silver or gold
- 8 1/2 x 6 notebook paper lined or unlined
- Counter Culture DIY Thin Viscosity Artist Resin
- Counter Culture DIY Quick Coat
- Freedom Red Dispersion Color
- Garnet Red Dispersion Color
- Ring of Fire Mica Powder
- Flaxen Gold Mica
- VIP Gold Foil Flakes
- I'm with the Band Precious Metals
- Silicone mat
- Large Silicone Mixing Sticks
- Mixing cups
- medicine cups
- Protective gloves
- Filter mask
Instructions
- Combine your Artist Resin according to the package instructions. If you are doing the front and back of the notebook at the same time, you will need about 8oz of combined resin.
- Pour 5oz of the combined resin into one cup. And 1 1/2oz into another cup. Add almost the rest of the resin to another cup and then the last tiny bit into a last cup.
- Next add 7 drops of the Freedom Red to your 3 oz cup plus a drop or two of Garnet and mix it well to combine.
- Then add a tiny bit of the Ring of Fire mica powder to the 1 1/2 oz cup and mix well to combine!
- Next add the tiniest amount of Flaxen Gold to your smallest cup. Mix it well to combine.
- Now add the VIP foil flakes a little at a time to your 5 oz cup of resin and mix well to combine.
- Start with your gold leaf resin. Pour a little into two corners catty corner from each other. Or kitty corner, whichever you prefer 😉 Use a stir stick to spread the resin evenly in the area. Don't fill the mold all the way to the top because you want to leave room for a doming layer of resin.
- During this step Karen also pours the back cover of her notebook using all gold leaf resin. For the back she fills the mold all the way up. This is because she won't need to do a top coat of resin on the back cover.
- Next, use the Dispersion color resin to fill in the center portion of the notebook cover. Use a mixing stick to spread it until it meats the gold leaf resin.
- Now add the mica resin to the red portion of the notebook. Then use your stick to add swirls. You will need to come back every so often to redo your swirls. Otherwise the mica tends to pool at the center of your project.
- Now pour your gold resin at the edges where the gold leaf and the pigment meet. Then drizzle the rest over top of the pigmented resin. Use your stick to swirl again.
- Then use a heat gun or spritz rubbing alcohol to pop any bubbles that have formed.
- Allow the resin to cure and then add any decal you want to use. Seal your decal with Quick Coat so the vinyl decal won't repel the epoxy. Then combine a batch of Artist Resin and pour in your top coat. This time you will fill the mold completely. Allow the resin to fully cure before assembling your note book.

The Finishing Touches
The resin notebooks that Karen has made are stunning! And she shares another great tip with us. We all know that wasting resin is a sin. Karen also shows us how to make matching bookmarks for the notebooks. Not only does this give us a way to use up every drop of our resin. It also adds a great touch whether you are gifting or selling your creations.
A big thank you to her for sharing her skills and knowledge with all of us again. If you loved learning from Karen and want to see more of here work, you can find her on Facebook and Instagram. And you can find more awesome video tutorials like this one on our YouTube channel!

You can find more awesome video tutorials like this one on our YouTube channel!
Be sure to follow us on Pinterest so you can stay on top of everything that’s new and never miss a blog post!
If you want more inspiration and information we have a Facebook group for that. Join us in Counter Culture DIY Artist Support where we, and other artists, offer ideas, answer questions, and support each other!
Do you have an art project using any of our products that you want to share? Send it to us at support@counterculturediy.com, and we can feature them here!