How to Dry Brush Paint with Furniture Refinishing Paint
Dry brush painting is easy to do and the results are beautiful! Learn all about how to dry brush paint with furniture refinishing paint. Give your furniture an aged rustic look in a few simple steps.
It’s no secret that we love refinishing furniture with our chalk paints. We also love learning new furniture painting techniques! We are excited to bring you another video tutorial by Rick Cheadle of Cheadle Designs. He teaches us all about how to dry brush paint with furniture refinishing paint.
Rick transforms two barstools using our Shock Paints and dry brush painting. This technique is so simple but gives big results! So grab your brushes and let’s get painting!
How to Dry Brush Paint with Furniture Refinishing Paint
An aged/rustic/farmhouse/distressed look of furniture has been steadily growing in popularity. It is especially well known among furniture painters. Artists who specialize in giving old furniture pieces new life are no strangers to dry brushing. Rick is sharing the secret of distressing furniture in a way that looks authentic, using dry brush painting.
How to Dry Brush Paint Supply List
- Lint free cloths
- Degreaser
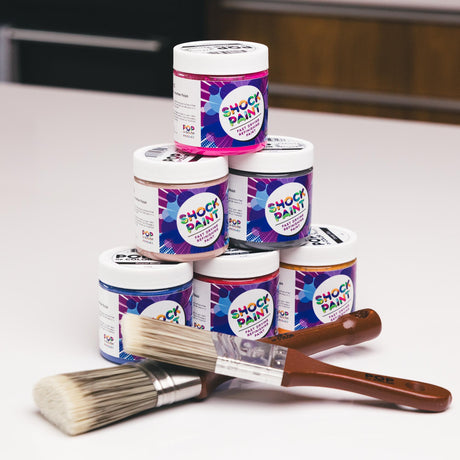
- Premium Medium Flat Furniture Paint Brush
- 2 Pop of Color Paint colors (Rick used Black an Beary Brown)
- Something to dab your paint off (paper towel, paper plate, scrap cardboard, etc.)
Step by Step Instructions
Prep your Furniture
- Start by cleaning your furniture with degreaser. This will remove any built up dirt and grime. Once your piece is clean, look for any areas that may need to be repaired or sanded. Get your piece prepped if necessary and then clean it again to remove any saw dust.
- Next grab your paints and brushes! Start with your main color. Rick used black for his barstools. Flip your piece upside down and do the legs and bottom first. Then paint the sides and top.
How to Dry Brush the Paint
- Now take a clean dry furniture brush and dip it lightly into your second color. Rick used Beary Brown for this step. You don’t want a lot of paint on your brush. Only dip the tips of the brush into the paint. And make sure the the tips aren’t heavily coated. You should still be able to distinguish the individual bristles. If you can’t, you will need to scrape your brush to remove the excess paint.
- Once the paint is on your brush, you will actually need to remove even more paint from it. To do this, you just need to blot your paint brush. Gently swipe your brush over your blotting surface to remove the paint. Don’t worry about losing too much paint, the dryer your brush the better. You can always add more if you need too.
- Now it’s time to get groovy. The secret to dry brush painting is to move quickly and lightly. You don’t want any spots on your piece where too much paint has been applied. Use light pressure and quick back and forth strokes to lightly apply the paint to the top of your piece.
- Make 2-4 strokes with the brush before adding more paint to it. Remember to blot the brush each time you add more paint to it.
The Next Steps
- Once the top of your piece is done, move on to the sides and bottom. Work your way downward and remember to keep your brush in motion as much as possible. Keeping your strokes light and quick prevents the paint from getting too heavy in any one area.
- When you are done with your dry painting, give your piece a good once over. Look for any areas where the paint looks too heavy. You can fix this in two ways. Since chalk paint is water based, you can use a damp rag to remove or blend any excess paint. You could also use sand paper to blend in any heavy spots.
- Now let your piece dry completely before moving on.
Finishing your Furniture
If, like Rick, you are dry brushing a piece of furniture that will get plenty of use, you will need to add a top coat. A top coat of either Finish It Wax or Pop Coat will protect your piece from the wear and tear of regular use. If you are dry brushing, you are probably going for a more rustic look. In that case, the furniture wax will give you protection while maintaining the aged look you love about your furniture.
If you using the finishing wax sounds good to you, check out our post How to Apply Wax to Chalk Paint. To learn more about the differences between varnish and finishing wax, check out our post How to Get the Perfect Finish with Furniture Refinishing Paint. We talk about the pros and cons of each so you will know exactly which one is right for you!
The Finishing Touches
And that’s it, Pop Stars! Dry brush painting is simple and effective. The results are a beautiful rustic finish that gives your furniture character and charm. Thanks to Rick for teaching us another fabulous furniture painting technique! You can see his amazing artwork and learn more techniques from Rick on the socials! Here are all the links…
If you would like more details on paint pouring or joining my community please be sure to check out the following links.
YouTube – https://www.youtube.com/channel/UCsmYknOXe6JMBK_WovyyIbw
Facebook – https://www.facebook.com/CheadleDesigns/
Instagram – https://www.instagram.com/rickcheadle/
Pinterest – https://www.pinterest.com/cheadledesigns/_created/
Twitter – https://twitter.com/RickCheadle
Pop of Color Shock Paints are sold exclusively at Counter Culture DIY. So now you have even more reasons to stop by!
You can find more awesome video tutorials like this one on our YouTube channel!
Be sure to follow us on Pinterest so you can stay on top of everything that’s new and never miss a blog post!
If you want more inspiration and information we have a Facebook group for that. Join us in Counter Culture DIY Artist Support where we, and other artists, offer ideas, answer questions, and support each other!
Do you have an art project using any of our products that you want to share? Send it to us at support@counterculturediy.com, and we can feature them here!